English Below.
DIYも魅力のパックラフト。使い込んでいくと見えてくる理想像。
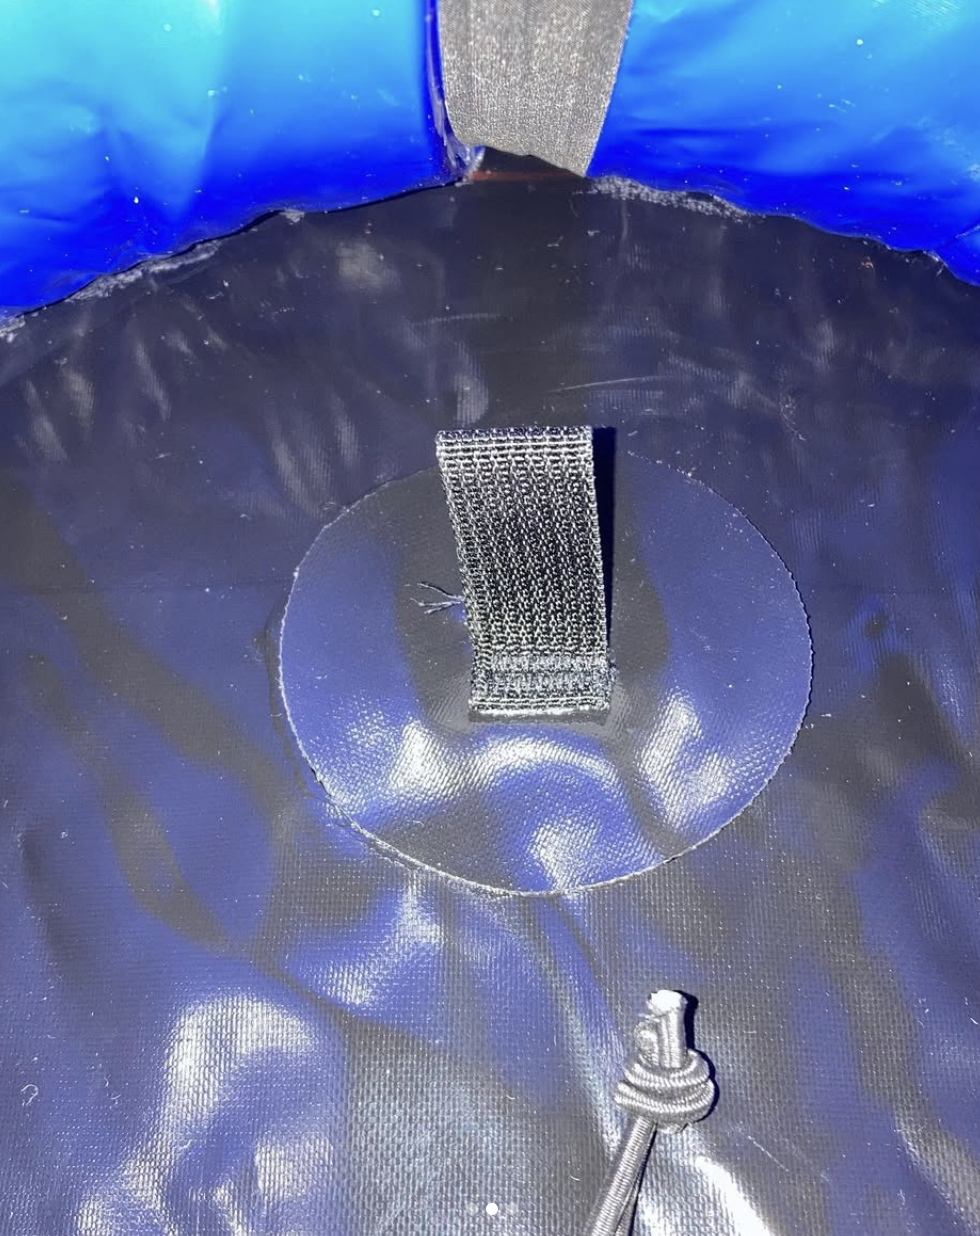
使いやすさの考察。バウ(船首)側のフロア部、要するに足元に、アルパカラフトの後付けパーツのグラブループをDIYで追加。取り付けについては、” ギアエイドのアクアシール+FD ” を使用するのが良いでしょう。
マイパックラフトの “ アルパカラフト クラシック “ には、フットブレースは標準装備ではありません。(2023年当時、アルパカラフトのホワイトウォーターモデル、ウルヴァリン、ナーワールには標準装備)
私は、補修キットなどの滅多に出し入れしない物をドライバッグに入れて、フットブレース代わりに足元に置いています。ただ、置いておくだけでは、万が一フリップ(引っくり返ること)してしまった場合には、ドライバッグが流される可能性があったので、DIYでグラブループを取り付けて、小型カラビナでドライバッグとグラブループを固定できる様にしたのです。
また、保温効果やフロア保護を狙ってサーマレストをコックピット内に敷くことも想定したのですが、使用していてもあまり効果的ではない+荷物が増えるので、今は採用していませんが、参考までに画像を貼っておきます。

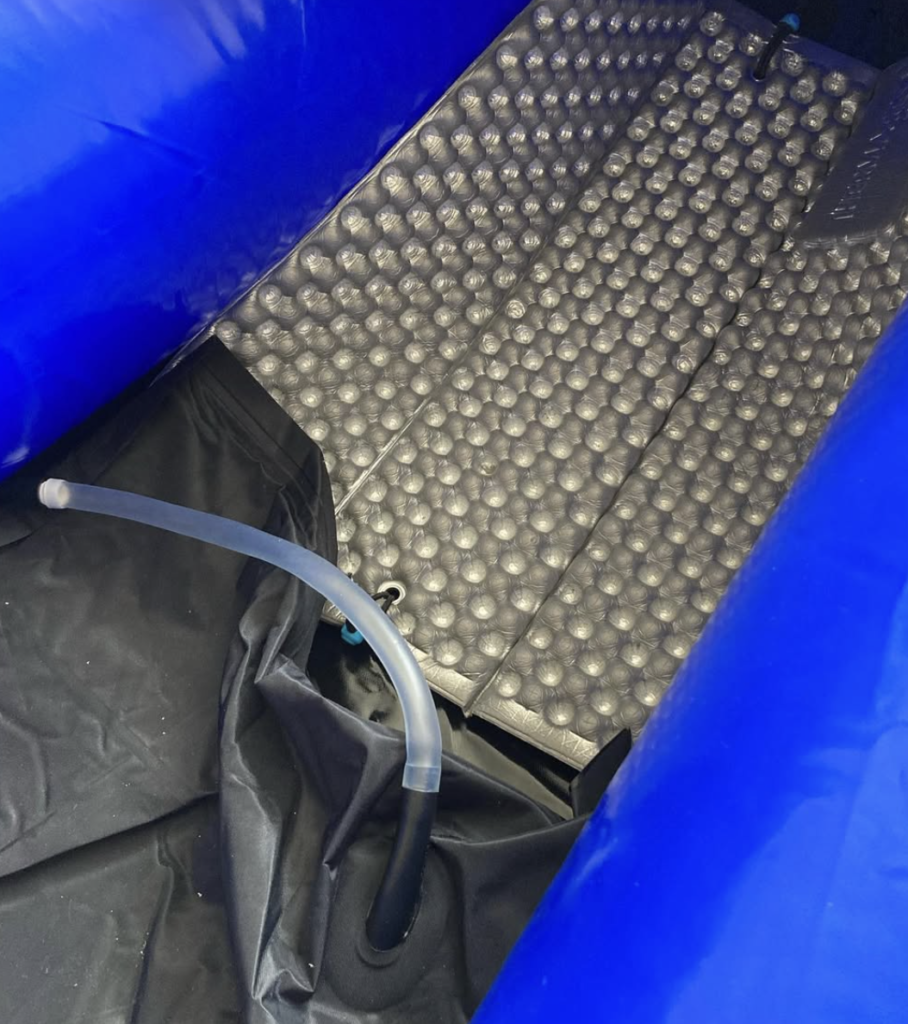
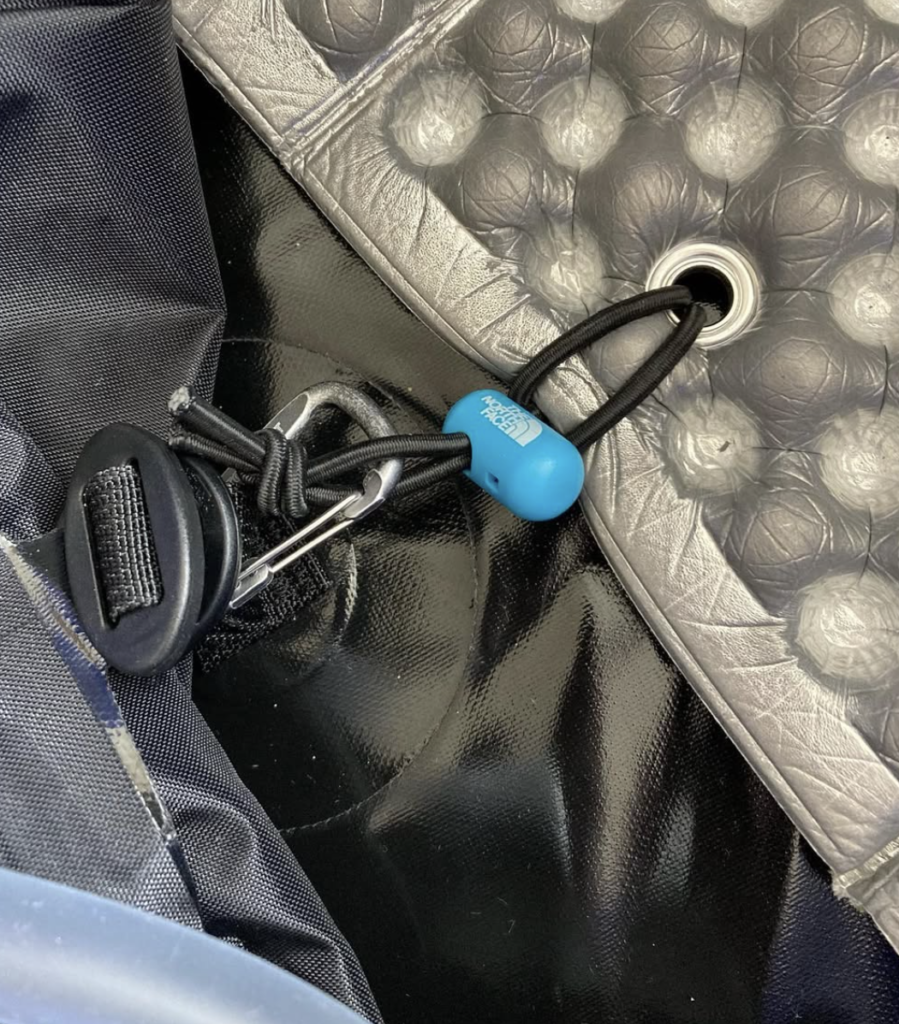
サーマレストの前後に、穴を開けてハトメを取り付けてバンジーコードを通しています。足元はDIYで取り付けたグラブループに固定、お尻側は、シート取り付けの為のフロアトグルが取り付けられていますので、そちらに固定。これで、フロアマットのサーマレストは流されません。

理想のパックラフトを作る手助けをしてくれるアイテム
アルパカラフトからは、この様な
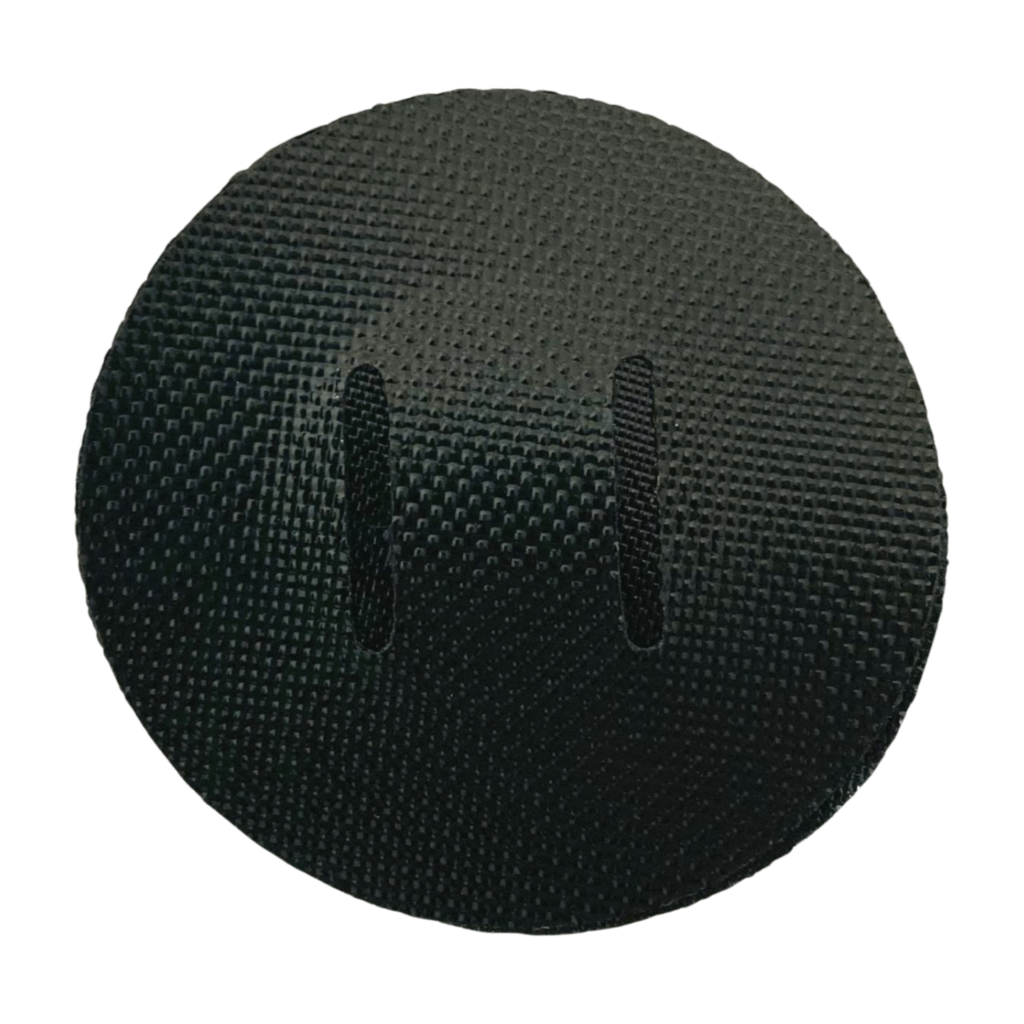
・何かを括り付けたい時に万能に使用できる今回取り付けた “ グラブループ
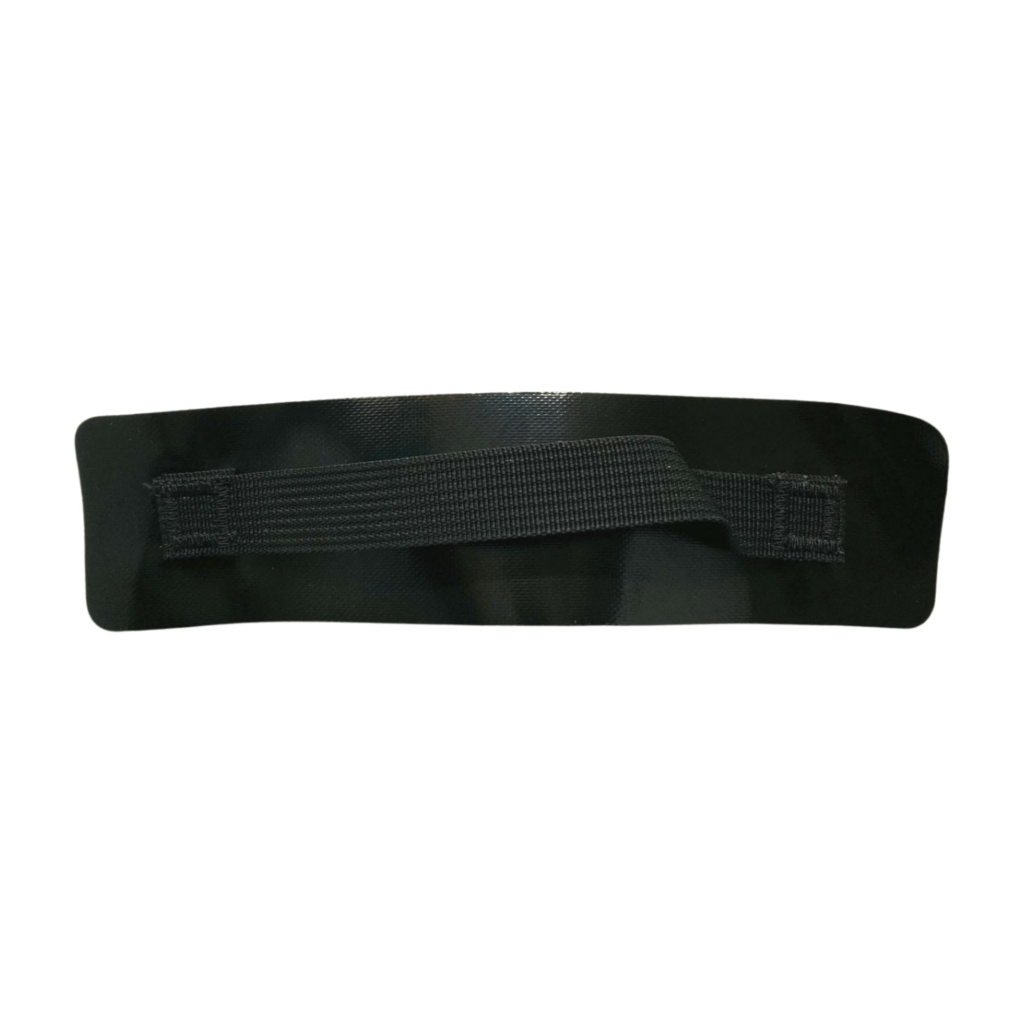
・自転車フレームや釣り竿のロッドケースなどをボレーストラップやタイタンストラップを通して固定できる “ ストラッププレート “

・パックラフト本体を持ち運びしやすくする “ キャリングハンドル “

・グラブループより強固な金属 “ Dリング付のプレート “
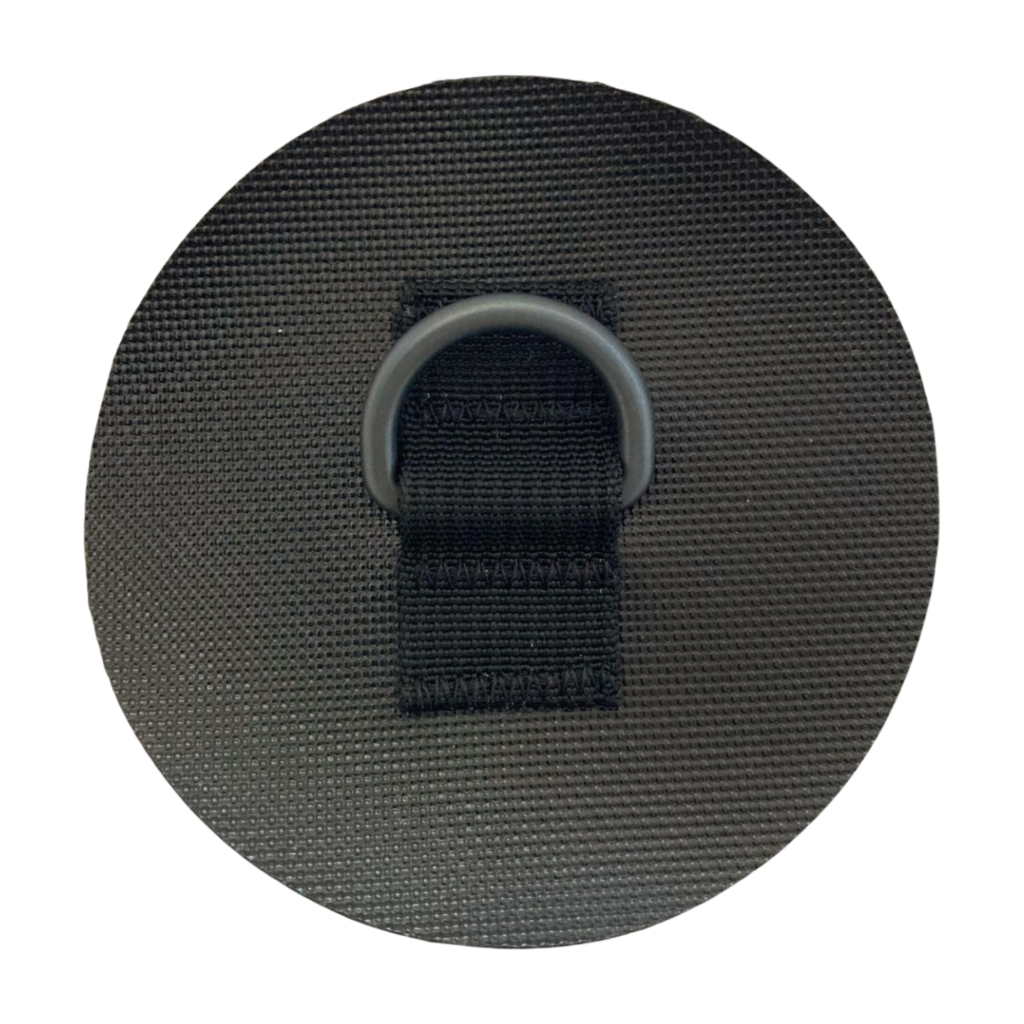
後付けパーツが用意されています。
これがパックラフトの魅力でもあると思うのですが、完成品から自分の使用用途によってカスタムしていけるということも魅力の一つです。
※追加のタイダウンポイントは、自転車の積載のためや、スターン(船尾)のセーフティラインを通すためのポイント追加など、特殊なパッキングオプションのためにボートをカスタマイズするために最適で素晴らしい方法です。追加のタイダウンは、DIYでご自身で取り付けるパーツとなり、取り付け説明書は含まれていません。購入される場合は、パックラフトに恒久的なアタッチメントを取り付けた経験があった方が望ましいですが、取り付ける場合は、アタッチメント・ポイントのベストな位置を確認と取り付け方法の熟考をしてください。
DIY is also an appealing packraft. The ideal image that comes into view as you use it.
Usability considerations. A DIY grab loop, a retrofit part of the AlpackaRaft, was added to the floor section on the bow side, in short, the foot section.For installation, it is advisable to use “ Gear Aid’s AquaSeal + FD ”.
The foot brace is not standard equipment on My packraft’s “ AlpackaRaft Classic”. (In 2023, it was standard on the AlpackRaft Whitewater model, Wolverine, and Gnarwhal.)
I keep my repair kits and other seldom-entered items in a dry bag and place them under my feet in place of the foot brace. However, if I just leave them there, they could be swept away in the event of a flip, so I added a DIY grab loop so that I can secure the dry bag to the grab loop with a small carabiner.
We also envisioned laying a Thermarest inside the cockpit for heat retention and floor protection, but since it is not very effective in use plus it increases the amount of luggage, we are not employing it now, but I will post a picture for your reference.
Holes are drilled and doves are attached to the front and back of the Thermarest, and bungee cords are threaded through them. The feet are secured to the DIY grab loops, and the butt side is secured to the floor toggles that are installed for seat attachment. Now the floor mat thermarest will not be swept away.
Items that help you create your ideal packraft.
From the alpaca raft, you can see
・Grab Loop” for all-purpose use when you want to tie something to the floor.
・Strap plates to secure bicycle frames, fishing rod cases, etc. through voile straps or titan straps.
・Carrying handles for easy transport of the packraft
・A metal “plate with D-ring” that is stronger than the grab loop.
Retrofit parts are available.
This is one of the charms of the packraft, and one of the charms is that you can customize it from the finished product according to your own usage.
*Additional tie-down points are a great, great way to customize your boat for special packing options, such as for bike loading or for additional points to pass stern (stern) safety lines. The additional tie-downs are DIY, do-it-yourself parts and do not include installation instructions. If purchasing, it is preferred that you have experience installing permanent attachments on your packraft, but if installing, please be sure to check the best location for the attachment points and be thoughtful about how to install them.
コメント